In a woodworking area, a rip-cut is a kind of cut that cuts off or partitions a piece of wood parallel to the grain. The other kind of cut is a crosscut, a cut opposite to the grain.
Dissimilar to crosscutting, which shears the wood strands, a rip saw works more like a series of chisels, taking off little splinters of wood.
The wood grain idea requires the saw teeth’ state to be different. The requirement is for both rip saws and crosscut saws, but some roundabout saw blades are blend blades and can make the two kinds of cuts. A rip cut is the principal sort of cut made at a sawmill.
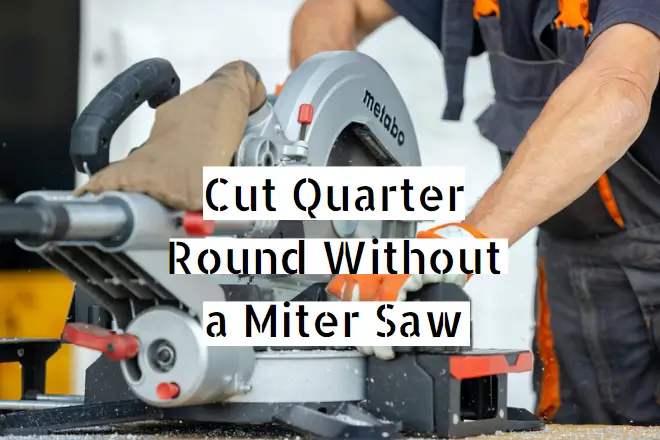
Is it Possible to Rip-Cut with a Miter Saw?
One of the essential elements of a Miter Saw is to make rip-cut cuts. Nonetheless, this may not generally be feasible for each workpiece and saw blade combination.
The main thing you want to consider before making any kind of cut with your miter saw is whether it will truly fit on the table surface.
If there is no space left (or then again, if you’re attempting to use a huge piece), we can’t make a Miter Saw Rip Cut without some assistance from different tools.
How to Choose your Miter Saw for Rip Cutting?
Since you have learned that you can utilize your miter saw to rip cuts. However, there are a couple of things you need to know. Firstly, you should choose the right miter saw for rip cutting.
Then we should investigate the different miter saws and their elements to see which one will turn out best for your requirements.
Essentially, there are three sorts of miter saws.
- Single Bevel Miter Saw
- Dual-Bevel Miter Saw
- Compound Miter Saw
If you are searching for a saw basically for ripping the wood, a single bevel miter saw will turn out best for you. But if you have to invest some amount and can bear the cost of the compound miter saw, I would strongly suggest it.
Anyhow, that is just a single element, and the significant thing to remember is the size of your miter saw. A huge miter saw will permit you to cut through a piece of wood in one go. However, the disadvantage is that it tends to be very hard to move.
Also, if there are many sharp corners or precarious points, I suggest getting a lightweight compound miter saw. It is on the grounds that they offer better control and movement over a lot more tight spaces.
I have a 12-inch Dewalt miter saw, and I am very easy with it. It brings about the ideal result on practically any project, and it hasn’t frustrated me yet.
If you’re confused, which miter saw to get for ripping? For the lumber, I would suggest going for the 12-inch sliding compound miter saw from DeWalt. Choosing the Right Blade for Ripping the Wood:
- If you have any desire to rip the wood with a miter saw, then you must pick the right blade for this purpose.
- A general-purpose blade will be sufficient. If your project requires a cleaner and smoother cut, I suggest getting an 80-tooth carbide-tipped blade from Bosch or Diablo.
- Otherwise, use any standard 40 teeth blade. Like Makita’s DMS20160GCTP40T Blade or Bosch 1420sz1480t Carbide Tipped Saw Blade.
- Whenever you choose the right blade for your miter saw, you will have no issue while cutting the wood with the miter saw.
Tips for Miter Saw Rip-Cut
The following are a couple of tips that can help you complete the project. Remembering these points will assist you with effectively ripping the wood using your miter saw.
- While cutting, make sure to keep your fingers on the opposite side of the fence guard.
- If you are making a rip cut with a miter saw, do not expand the piece of your body off either side of the saw blade.
- Continuously wear security goggles or glasses. While using machinery, never operate without wearing security glasses to protect your eyes.
- Never wear free clothes, ties, or long hair while working with machinery.
- Wear slip-resistance footwear for added security and equilibrium.
- Try not to stand in front of the wood being cut if you are making a rip cut with a miter saw as this can cause injury to your lower body.
- Always ensure that while using a straight-edge guide. There is no space between the blade and the board, so it can’t injure any piece of your hand while ripping through on one side. Before cutting, keep your fingers off either end of the fence guard.
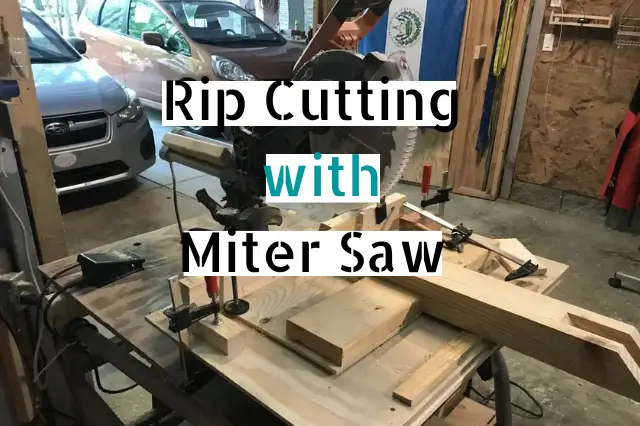
How to Rip-Cut with a Miter Saw?
Source: youtube
Here is a step-by-step guide to dealing with ripping wood with a miter saw. I expect you to choose the right miter saw and mount the right blade before starting. This part will assist you with understanding how to move toward the project and get better results at the end.
-
Step 1
Use your straight edge to put a line on your desired board to cut. Hold the wood solidly against the fence and lock it down with one hand. Be careful not to touch any piece of the blade or get your fingers in front of it while cutting since this can cause injury.
-
Step 2
Ensure there is no space between where you are holding the piece and where you begin ripping it. As well as no place for your hands to go, would it be a good idea for them if they slip away while firing up the saw (i.e., keep them out from one or the flip side)?
-
Step 3
Presently be prepared – use both your hands together. So one side controls speed while the other controls directing precision. Put your right hand’s thumb close but not at or on the saw’s switch and use it to push down on the left half of the board.
-
Step 4
Pull the saw back so that you’re not touching anything. Afterward, use your right hand’s thumb to push down on the left half of the board while using your left hand to hold it in place.
Rehash this cycle with a little piece or two preceding going for a long cut — this guarantees any “kinks” are out of the framework.
-
Step 5
Gradually bring the blade up until it is flush with where you need to begin ripping from (against one end) whenever this is done. There ought to be no space between the things you are holding. And where you will rip from since, supposing there is space, your hands could get away while firing up the saw, which can cause injury.
Presently, hold both hands together. Put your right hand on top of the left, and afterward, slide your right in the middle between them, taking out as much possible slack.
-
Step 6
Slide your hands separately from one another to start up the saw. The blade ought to now be flush against what you’re holding with a little space, yet insufficient that it will prompt a mishap if there is slippage.
In order to wipe things off after completing a cut: Use compacted air (from a blower) or thump away the residue with your arm.
Conclusion
If you are a beginner, you might have a few queries regarding the miter saw rip cut. Here, everything is explained thoroughly in the above article. You can use your miter saw to rip the wood. Nonetheless, there are a couple of things you have to make sure of before working on these kinds of projects.
The primary thing is to ensure you are using the right miter saw. Preferably, the greater the saw, the simpler the process will be. The greater saws are normally restricted concerning mobility.
Aside from that, ensure you have prepared the right blade to care for everything. It will help you a ton in completing the task with the greatest effectiveness.
I am Arxal, the founder and main writer of sawgeeks.com. Passionate about woodworking and power tools, I started this blog to share my knowledge and experiences with others in the field. Through my articles, I aim to provide helpful information and create a community for fellow saw geeks.